Retail Display LED Lighting Brief: Color, Heat, Wiring and Changeability
Turn merchandise, viewing, cabinet, thermal, wiring, reconfiguration and maintenance conditions into a comparable display-lighting inquiry and sample plan.
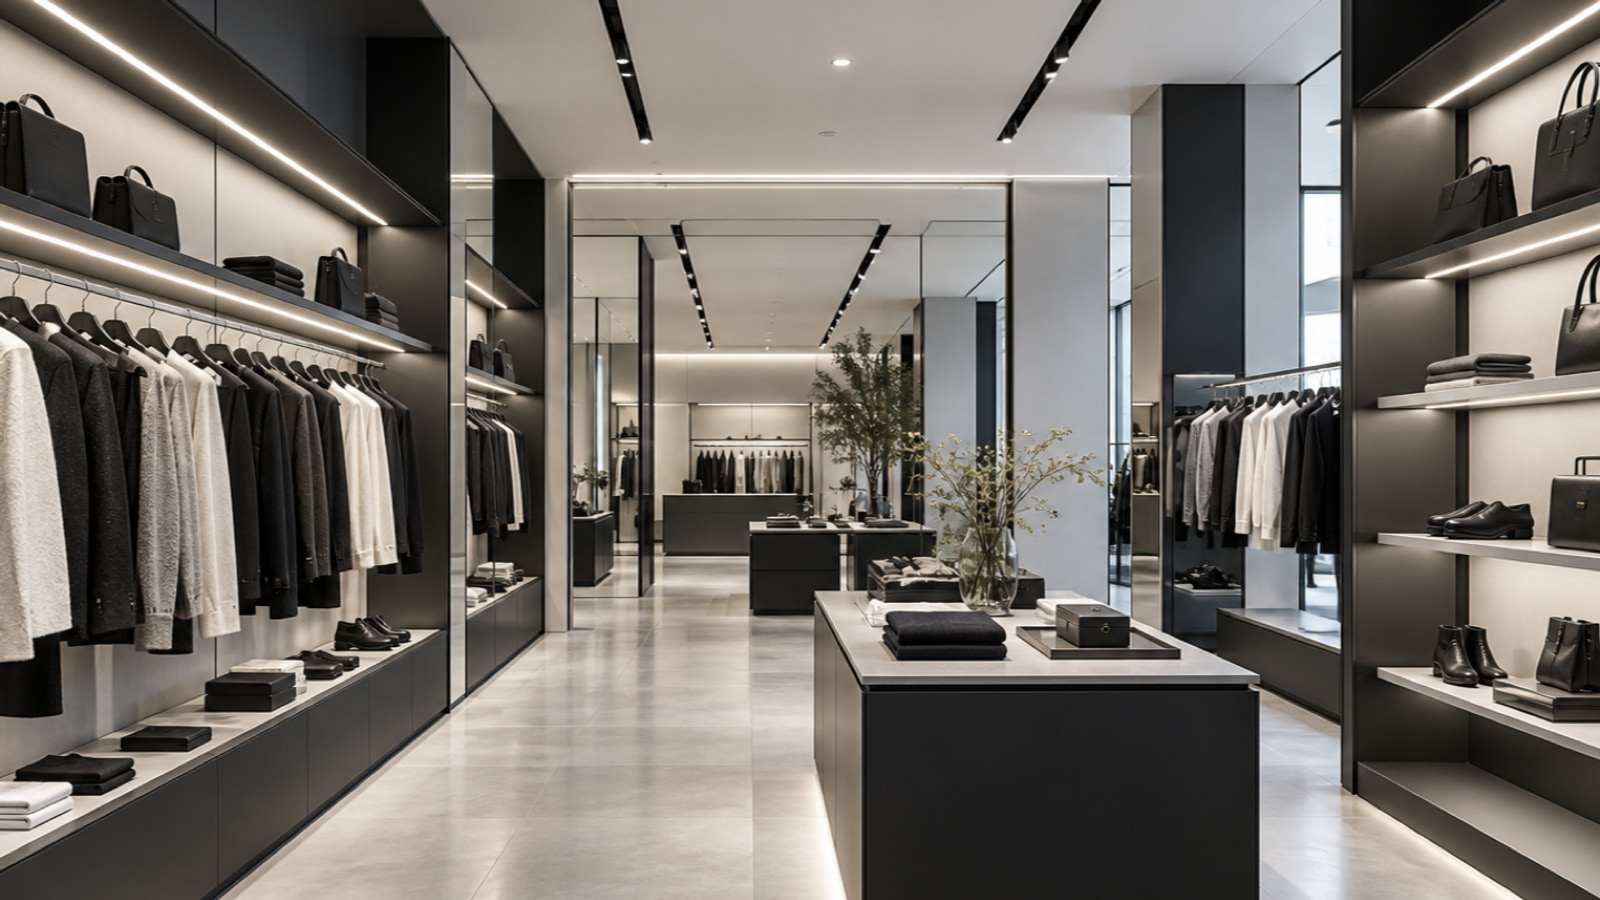
Before asking a supplier to quote retail display LED lighting, prepare the merchandise type, its materials and colors, normal viewing positions, case or shelf dimensions, mounting space, glare-control requirement, operating schedule, cable and power-equipment locations, service method, quantity, and destination market. These inputs turn a visual idea into a specification that a supplier can review and sample.
This retail display LED lighting specification checklist is for retail designers, display-case manufacturers, and project contractors. It helps those teams describe the lighting task and integration constraints. Explore our retail and display lighting options, then use this checklist to prepare a comparable technical brief.
Build the brief around merchandise and viewing positions
Start with what customers must see, not with a preferred strip or color temperature. A jewelry case, cosmetics shelf, folded-clothing wall, food display, and mixed-material product table present different colors, textures, reflections, and shadow risks.
For commercial lighting projects, the same store may combine an enclosed display case, open retail display shelves, and movable feature tables, so each zone needs its own row in the brief.
For each display zone, record:
- merchandise category and representative samples;
- important colors, surface finishes, textures, and reflective parts;
- whether merchandise lies flat, hangs vertically, rotates, or changes position;
- normal customer eye positions, including standing, seated, close, and aisle views;
- staff viewing positions used for restocking or inspection;
- daylight, ceiling lighting, and nearby illuminated surfaces;
- the intended visual result, described with an approved reference or a sample comparison rather than terms such as “premium” alone.
A display that looks balanced from the front may expose bright points from a lower aisle view or reflect the source in polished packaging. Mark the viewing range on the elevation and section so the supplier can review source concealment, beam direction, and shielding against the actual geometry.
Separate color temperature, color rendering, and merchandise appearance
Correlated color temperature describes the appearance of white light along a warm-to-cool scale. Color rendering describes how a source affects the appearance of object colors compared with a reference. They are related to the viewing result, but one does not replace the other. CIE S 025 lists CCT and CRI as separate measured quantities, while CIE guidance also recognizes that color-quality assessment can require information beyond one general fidelity index.12
Do not assign one universal CCT or one color-rendering threshold to every product category. Instead:
- identify the merchandise colors that must remain credible;
- ask for the candidate’s applicable photometric and colorimetric data;
- compare shortlisted sources with the same representative goods;
- keep drive level, diffuser, mounting position, ambient light, and viewing position consistent;
- record any color preference as an acceptance observation, not as an unsupported product claim.
For mixed merchandise, test more than the easiest item. A sample set might include a saturated color, a pale neutral, a dark matte surface, a glossy package, skin-tone imagery, and any material that has previously been difficult to present. The sample set should reflect the real assortment rather than a generic color card alone.
Coordinate the light source, shield, and viewing angle
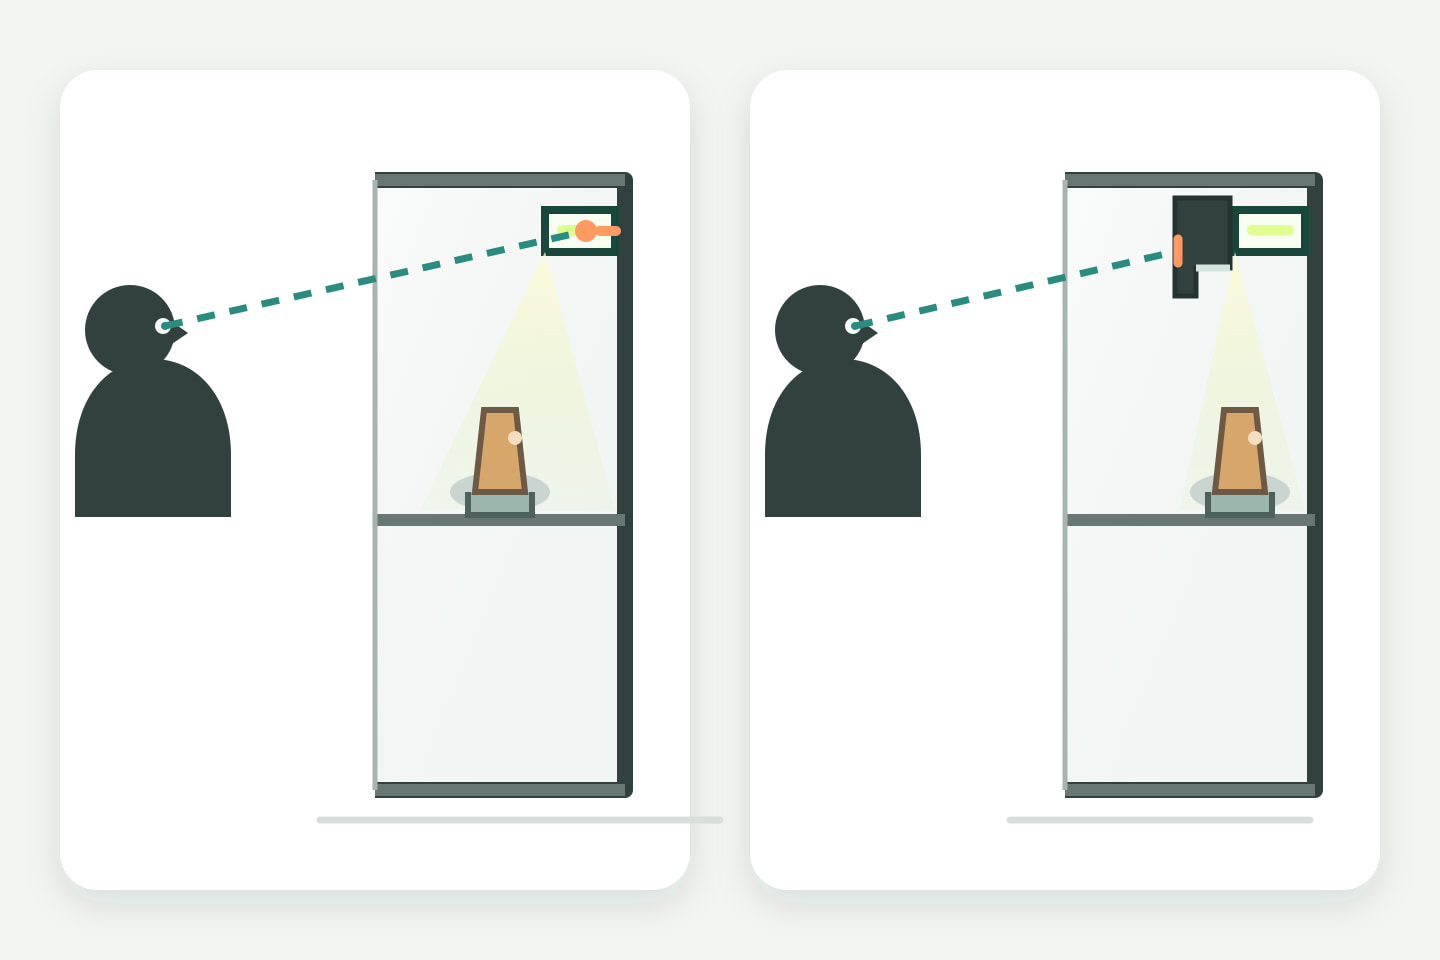
Glare control is a geometric task. The light source, diffuser or shield, shelf edge, customer eye position, and illuminated merchandise must be reviewed together.
Use a section drawing to show:
- the visible opening and available recess;
- the proposed light-source position and aiming direction;
- shelf nosing, baffle, lip, or other shielding element;
- minimum and maximum customer eye positions;
- the first reflective merchandise surface;
- any mirror, glass door, polished shelf, or glossy back panel;
- the path for removing the lighting assembly.
Move the source or shielding in a mockup when a normal viewing position exposes the bright emitting surface. Do not assume that a deeper profile, frosted diffuser, or higher LED density will solve every reflection. Each changes a different part of the optical arrangement and should be evaluated in the intended case.
Record cabinet, shelf, and profile constraints
Provide an elevation, plan, and section for each repeatable display type. Record finished dimensions rather than nominal cabinet labels.
The integration brief should include:
- usable length, width, and depth of the lighting recess;
- material and finish of the mounting surface;
- profile, diffuser, clip, end-cap, connector, and cable clearances;
- door, drawer, shelf, bracket, and merchandise movement envelopes;
- permitted drilling, routing, bonding, and fastener methods;
- cut, join, corner, and termination locations;
- tolerances that may accumulate across modular fixtures;
- whether the light line is factory-installed, site-installed, or split between both.
The rigid linear lighting category provides a current product-family route for candidate discovery. A category label does not prove fit. Compare exact dimensions, connection details, optical assembly, mounting instructions, and service method against the case drawing.
Plan heat, wiring, power equipment, and service access
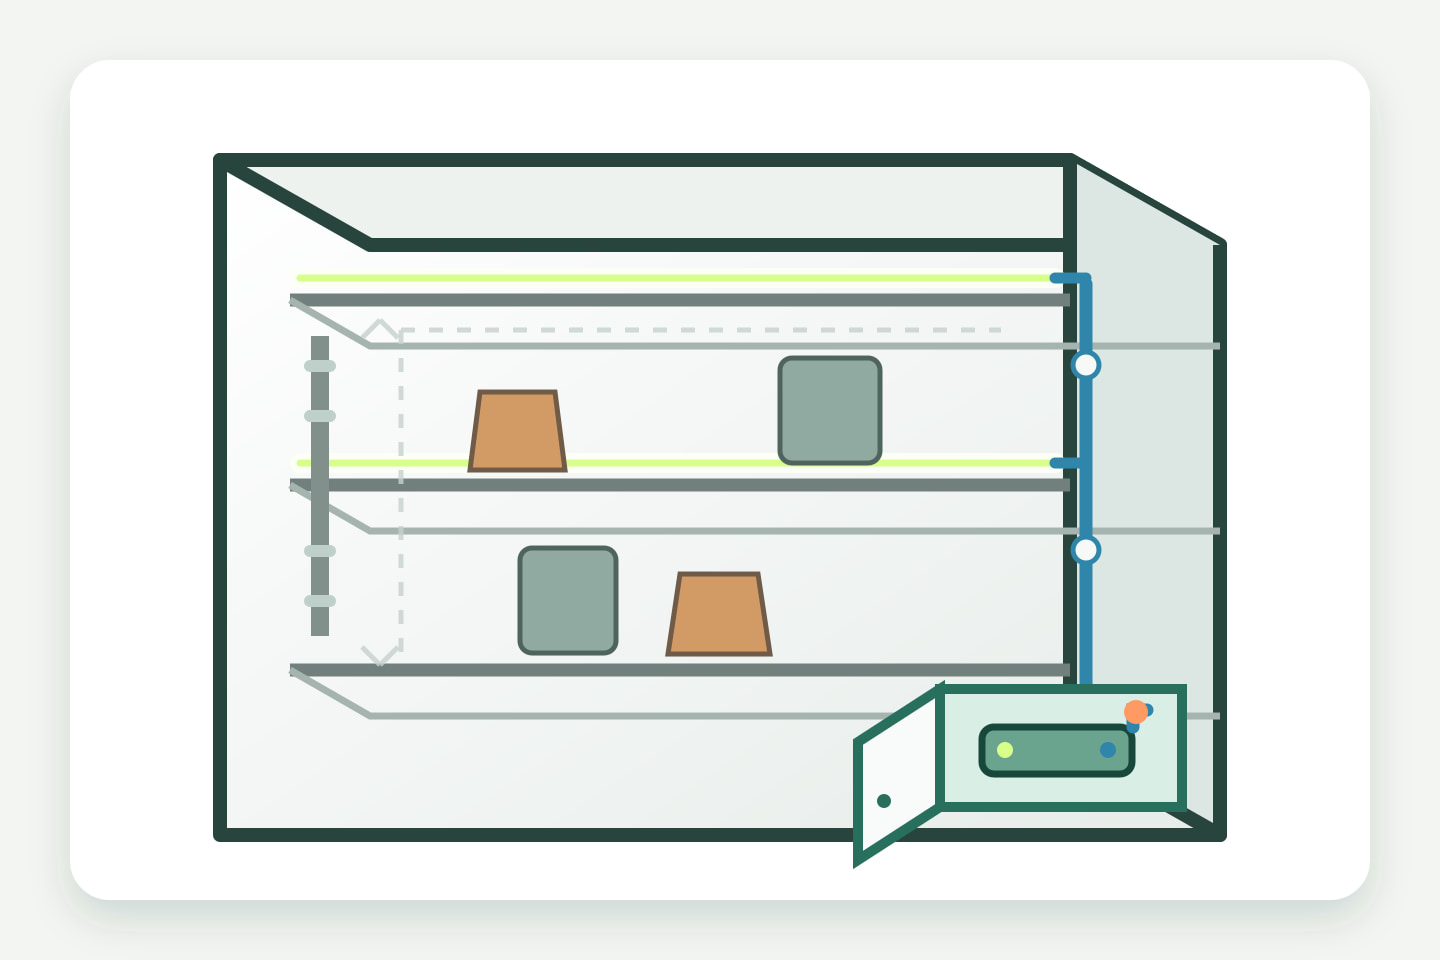
LED systems still create heat. The relevant thermal path can include the LED assembly, circuit board, mounting interface, profile or luminaire body, cabinet material, and surrounding air. The U.S. Department of Energy identifies drive current, thermal path, and ambient temperature as factors affecting LED junction temperature.3
Map the intended heat path instead of treating the shelf void as unlimited cooling space. Record the cabinet material, enclosed volume, nearby heat sources, ventilation openings, operating schedule, and any insulation or adhesive layer that may interrupt heat transfer. Use the selected product’s installation instructions and limits for final review.
Draw the electrical path separately from the visible light line. Show:
- each lighting branch and its approximate routed length;
- feed points, joins, connectors, and cable exits;
- power-supply and controller locations;
- mains and low-voltage boundaries;
- switching, dimming, or control zones;
- accessible isolation points where required by the project design;
- removable panels, tool access, and replacement clearance.
Do not hide a power supply behind fixed merchandise panels or seal a connector inside an inaccessible shelf simply to preserve a clean elevation. Define which part is opened, who can reach it, and how the component is identified before fabrication.
Keep the display changeable
Retail displays change. A lighting brief should state how the system responds when shelf height, product depth, merchandise color, or layout changes.
Choose one of three change strategies for each zone:
| Change strategy | Suitable situation | Information to define |
|---|---|---|
| Fixed lighting position | Product type and shelf geometry remain stable | Approved merchandise envelope, viewing range, aiming, and replacement method |
| Adjustable lighting position | Shelves or displays move within a known range | Adjustment track or mounting points, cable slack control, permitted positions, and re-aiming method |
| Modular replaceable section | Display modules are reconfigured or serviced individually | Section length, connectors, identification, spare strategy, and access sequence |
Avoid loose cable loops that can be pinched by adjustable shelves. If movement is expected, define a restrained cable route and the permitted range of travel. If a lighting section is replaceable, confirm that adjacent finishes do not need to be removed or damaged to reach it.
Use this input-to-decision table
| Input condition | Choice it affects | Information to give the supplier |
|---|---|---|
| Merchandise colors and finishes | Spectrum and sample set | Representative products, critical colors, finish type, and approved reference condition |
| Customer viewing range | Source position and shielding | Eye-height range, aisle distance, glass or mirror locations, and section drawing |
| Case and shelf geometry | Lighting format and mounting | Dimensioned plan, elevation, section, recess, tolerances, doors, brackets, and moving parts |
| Desired light distribution | Optics and placement | Area to illuminate, shadow limits, aiming direction, and acceptable spill |
| Enclosed or heat-sensitive construction | Thermal integration | Materials, enclosure volume, ventilation, nearby heat sources, and operating schedule |
| Cable restrictions | Feed and connection plan | Permitted exits, routed lengths, joins, removable panels, and separation constraints |
| Power and controls | Supply and control architecture | Available input, supply location, switching or dimming task, zones, and control interface |
| Shelf and product changes | Adjustment or modularity | Movement range, change frequency, cable management, and re-aiming responsibility |
| Maintenance plan | Service access and spares | Access panel, removal sequence, replaceable unit, identification, tools, and spare policy |
| Commercial scope | Quotation and compliance review | Quantities by display type, destination market, installation responsibility, and required documents |
Use one row per display type when conditions differ. Do not merge a glass showcase and an open wall shelf into one generic line if their viewing, heat, or access conditions are different.
Complete the procurement checklist
- Project name, destination market, installation stage, and responsible drawing revision are stated.
- Quantities are separated by case, shelf, island, or repeatable display type.
- Dimensioned plans, elevations, and sections show the available lighting envelope.
- Merchandise categories, representative samples, key colors, materials, and finishes are listed.
- Normal customer and staff viewing positions are marked.
- Desired appearance, illuminated area, shadow limits, and glare concerns are described.
- Candidate CCT and color-rendering data are requested without treating either as the complete appearance decision.
- Profile, diffuser, shield, mounting, cable, connector, and end-treatment space is shown.
- Cabinet material, enclosed volume, nearby heat sources, ventilation, and operating schedule are provided.
- Branches, feed points, power supplies, controllers, cable routes, and service panels are drawn.
- Shelf adjustment, merchandise change, re-aiming, and cable restraint are defined.
- Replaceable units, removal sequence, identification, and spare strategy are stated.
- Required documents and the sample-approval process are listed for the destination market.
Evaluate a representative sample
Build the sample with the intended merchandise, shelf finish, glass or mirror, profile, diffuser or shield, cable exit, and control condition. If the project has several case types, choose the one with the shallowest recess, most reflective merchandise, most difficult viewing angle, or least accessible service path.
Evaluate the sample in a repeatable sequence:
- confirm the sample configuration and drawing revision;
- operate it at the intended control setting and after a defined stabilization period from the applicable product instructions or test plan;
- view it from the marked customer and staff positions;
- compare representative merchandise under the same ambient lighting;
- check source visibility, reflected glare, shadows, edge brightness, and light spill;
- inspect cable restraint, connectors, power-equipment access, and temperature-measurement locations if the project requires measurements;
- change one shelf position or merchandise layout and repeat the relevant viewing checks;
- remove and refit one replaceable lighting section using the intended access path;
- record photographs with controlled exposure as supporting evidence, not as a substitute for in-person review.
Set project-specific acceptance criteria before the sample is shown. The method above is an evaluation framework; it is not ULANTU test data or a promise that one configuration will suit every retail environment.
Catch common omissions before quotation
Common quotation gaps include dimensions without tolerances, a CCT request without merchandise samples, a front elevation without customer eye positions, an IP label without a defined cleaning exposure, and a power total without branch or cable routes. Other frequent omissions are fixed panels over drivers, no allowance for connector length, shelf movement without cable management, and one sample approved under ambient light that differs from the finished store.
Resolve these items before comparing prices. Two quotations are not technically comparable when one includes profiles, diffusers, drivers, controls, connectors, service access, and sample work while the other lists only a light source.
When the drawings and checklist are ready, Submit a Display-Lighting Brief. Provide cabinet dimensions, merchandise type, installation position, quantity, and destination market, together with the viewing, wiring, service, and sample-review inputs above.
Sources
[1] International Commission on Illumination, “Test Method for LED Lamps, LED Luminaires and LED Modules” (CIE S 025/E:2015). Supports treating CCT, CRI, photometry, and angular color uniformity as separately reported quantities and comparing defined configurations; it does not establish performance for an unspecified ULANTU product. Accessed 2026-10-11.
[2] International Commission on Illumination, “Overview of Methods for Evaluating Colour Rendition of White-Light Sources beyond Colour Fidelity” (CIE 253:2024). Supports the limit of reducing color rendition to one general fidelity value; merchandise acceptance still requires a project sample. Accessed 2026-10-11.
[3] U.S. Department of Energy, “Thermal Management of White LEDs”. Supports the general thermal-path principle and the roles of drive current, ambient temperature, and heat transfer; exact model instructions and limits control. Accessed 2026-10-11.
Bring the comparison into a project brief.
Share the documented requirements and unresolved questions. An inquiry begins review; it does not confirm engineering approval, compatibility, stock, price, lead time, compliance or an order.
Prepare a project brief